Integrate Faction into OIDC Solutions
Faction seamlessly integrates with your existing enterprise authentication solutions, ensuring a smooth and secure user experience. Leveraging widely adopted solutions such as LDAP and OIDC, Faction effortlessly integrates into any enterprise environment. Our platform is designed to adapt to your authentication infrastructure, providing a hassle-free implementation process and enhancing the overall efficiency of your organization’s security framework. With Faction, you can trust in a unified and streamlined authentication experience tailored to your enterprise needs.
The article will walk through the steps needed to integrate Faction into Google Auth, Auth0, or Ping Identity
Google OIDC Setup
- Log into your company’s Google API Console.
- Click on Credentials from the left navigation.
- Click + Create Credentials from the top navigation.
- Select OAuth Client ID.
- Select Web Application as the application type.
- Name the application something specific like Faction OIDC Integration. But the name does not matter.
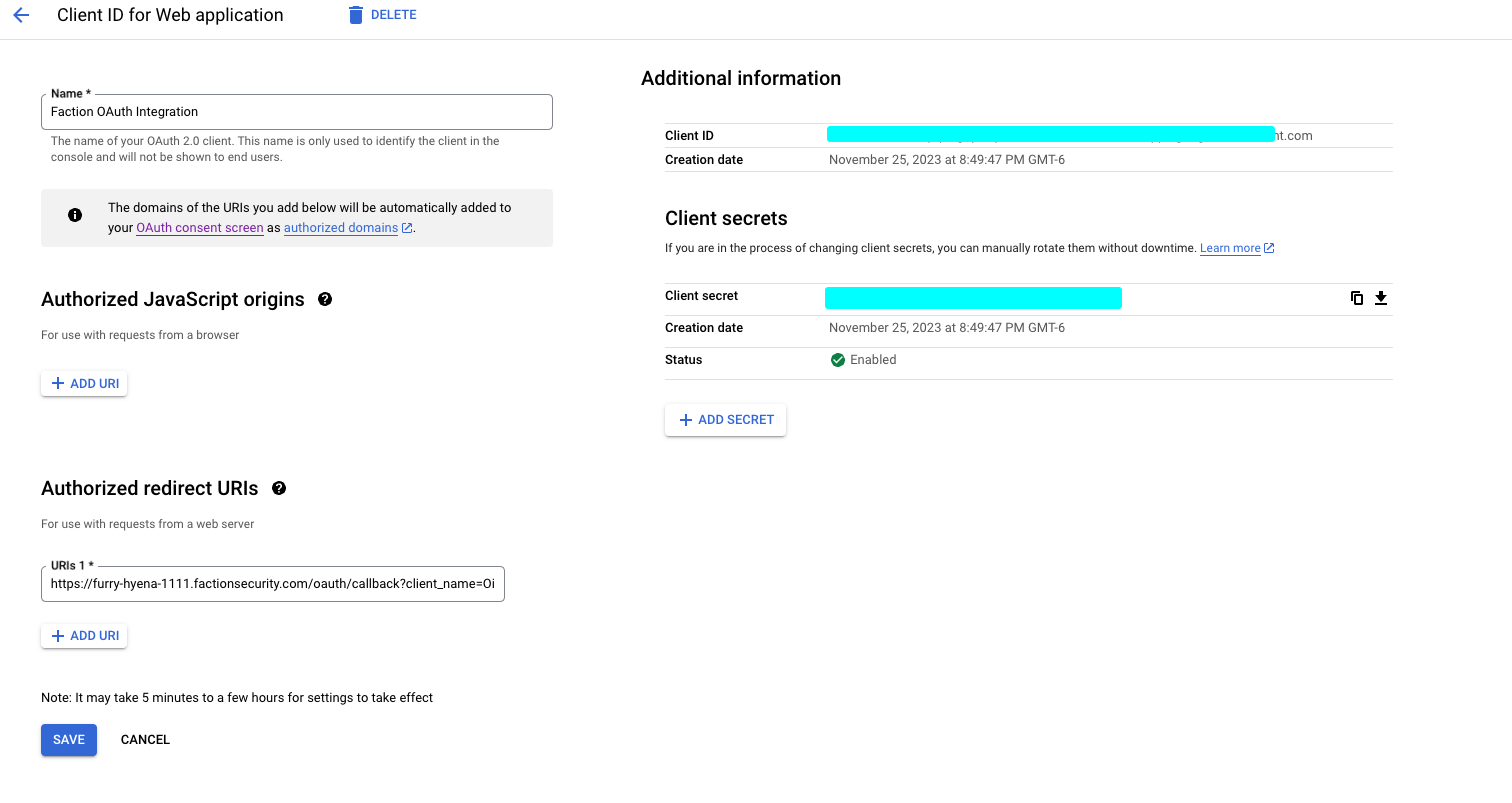
- Under Authorized redirect URLs click + ADD URI.
- Enter the domain of your Faction Instance and append /oauth/callback?client_name=OidcClient to the path. Example: If you used Faction to host the site your URL would look like this:
https://furry-hyena-1111.factionsecurity.com/oauth/callback?client_name=OidcClient - Then Click Create.
- Take Note of the Client Id and Client Secret. This will be used later in the Faction Admin Section.
Your Setup should look like the following:
Auth0 OAuth Setup
- Log into your Auth0 Console.
- Select Applications in the left navigation.
- Click + Create Application
- Select Regular Web Application.
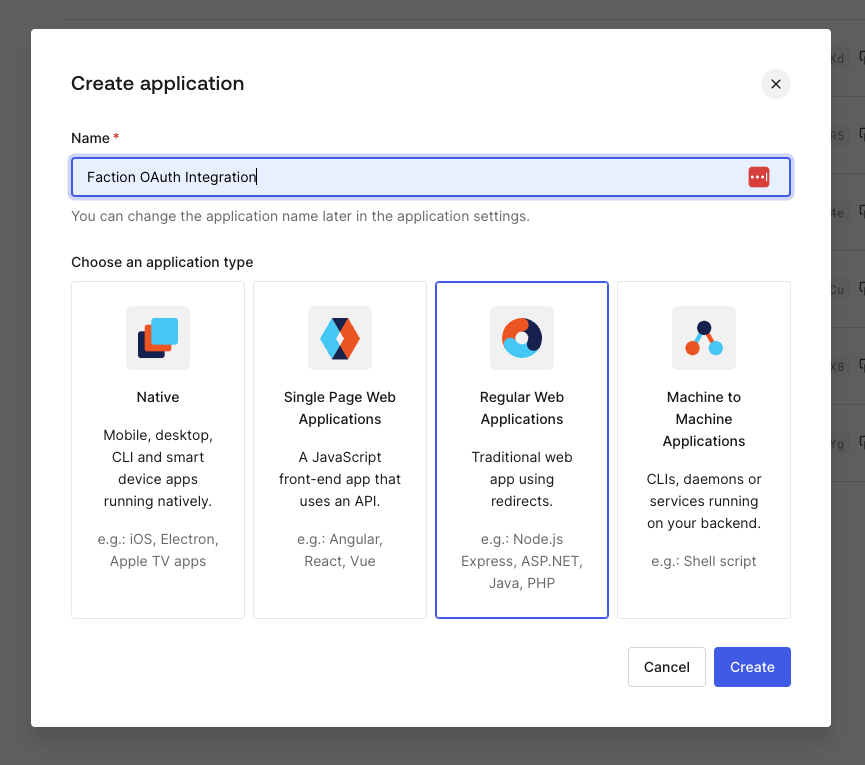
- Name it something like Faction OAuth Integration.
- Click Create.
- Ignore the Quick Start screen and Click Settings.
- In the Allowed Callback URLs, enter the domain of your Faction Instance and append /oauth/callback?client_name=OidcClient to the path. Example: If you used Faction to host the site your URL would look like: https://furry-hyena-1111.factionsecurity.com/oauth/callback?client_name=OidcClient
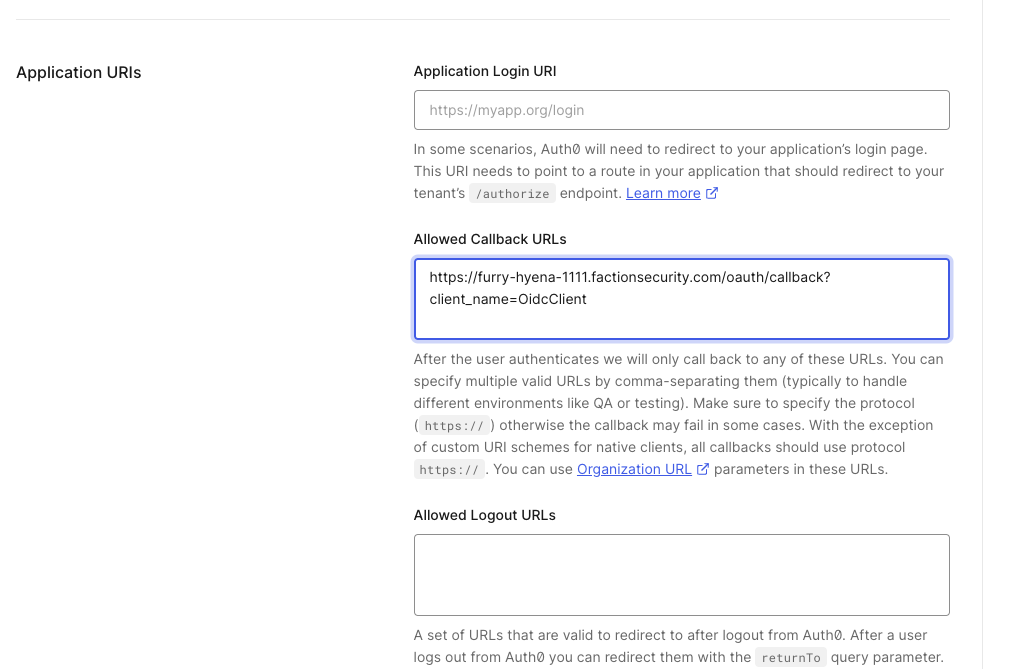
- Take Note of the Client Id and Client Secret. This will be used later in the Faction Admin.
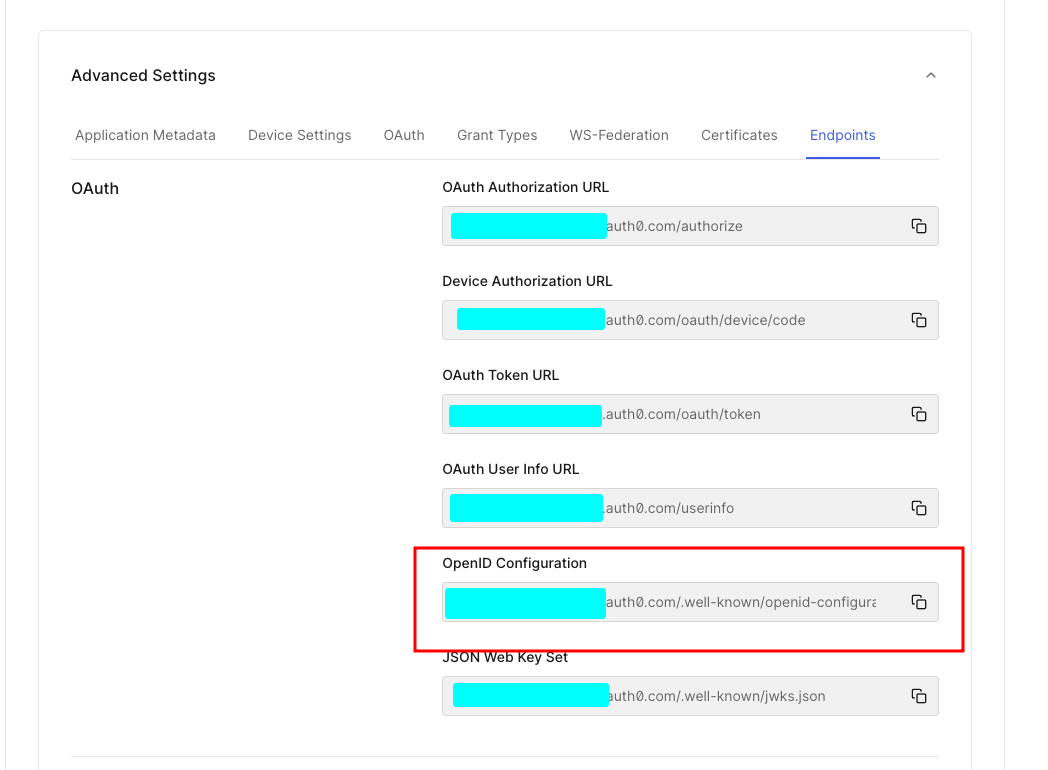
- Scroll down to the bottom and Click Advanced and then Endpoints
- Take note of the OpenId Configuration URL
Ping Identity Setup
- Log into Ping Identity Console
- Select Applications.
- Add a New Application.
- Give the Application a name like Faction.
- Select OIDC Web App.
- Click Save.
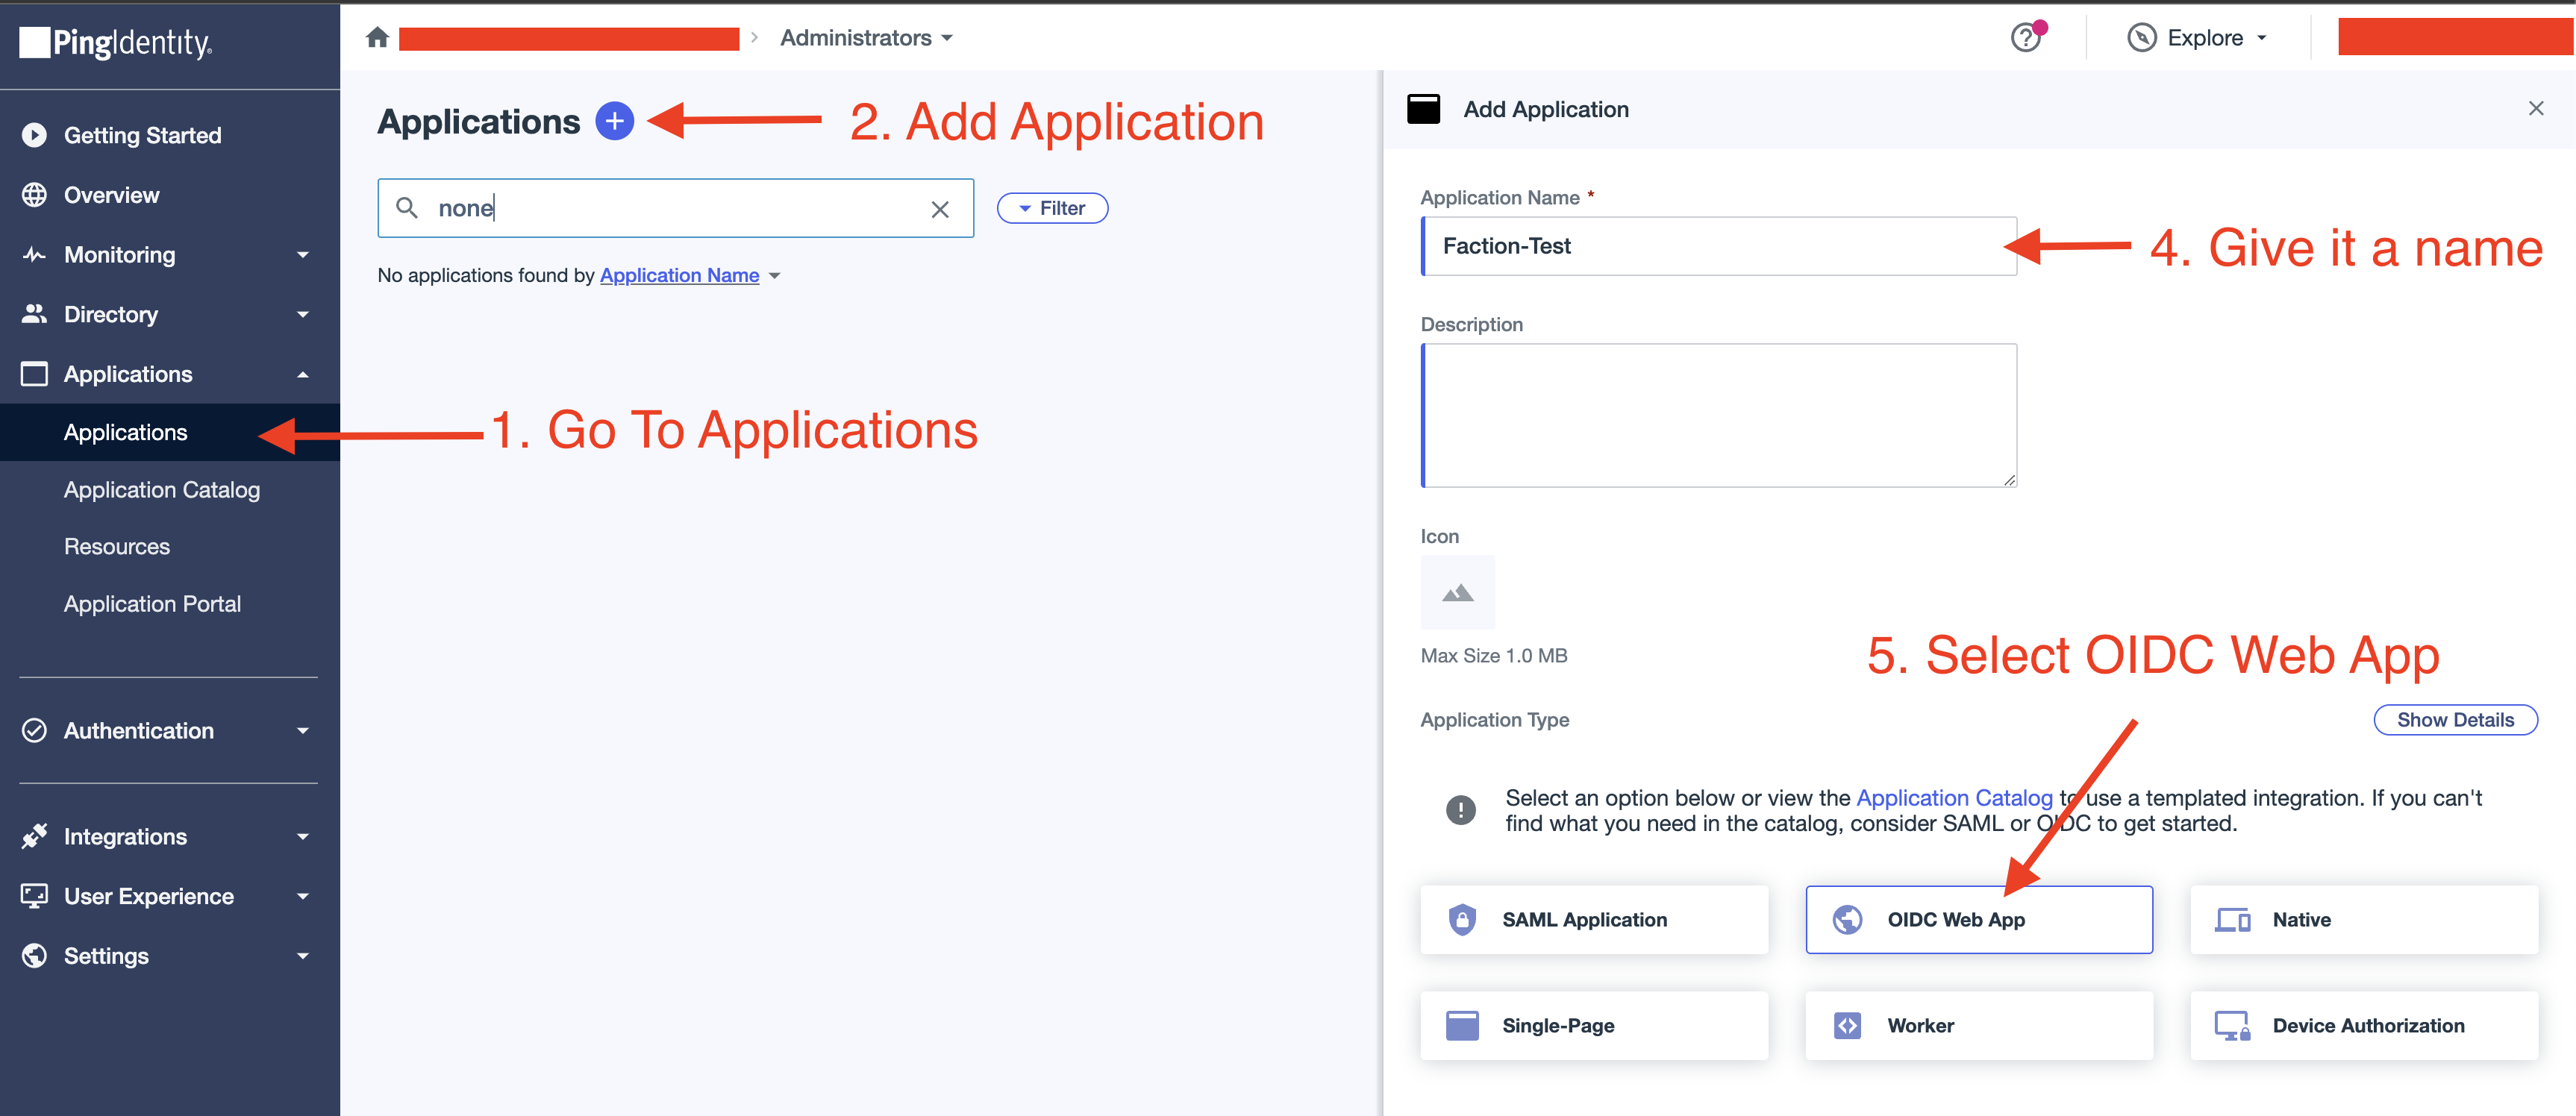
- Open the newly created application and select the Configuration tab:

- Click the Edit Button in the upper right corner
- Scroll down to the Redirect URI Section and enter your Host Name with the path
/oauth/*. (Example:https://furry-hyena-1111.factionsecurity.com/oauth/*) - Click Enable Redirect Patterns.
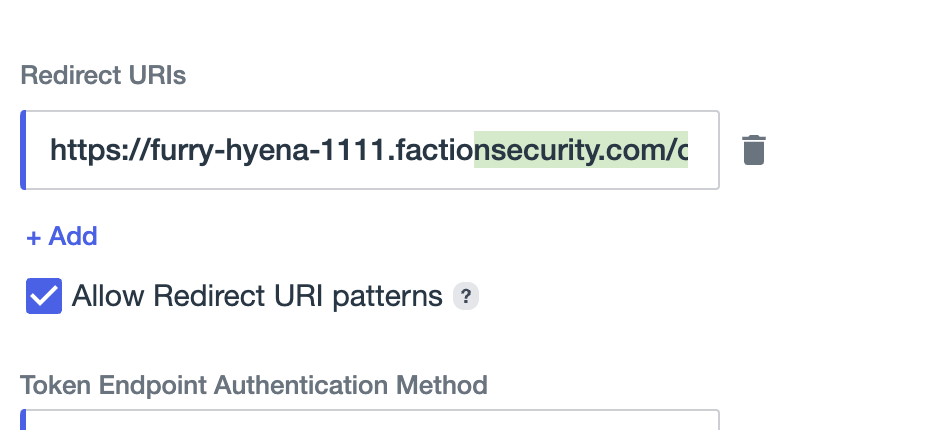
- Click Save.
- Scroll up to the top of the configuration.
- Expend URLs and take note of the the OIDC Discovery Endpoint. This will be used later in the Configure Faction Section.
- Take Note of the Client Id and the Client Secret. These will be used in the Configure Faction Section
- Click the Attribute Mappings tab.
- Add email as an attribute.
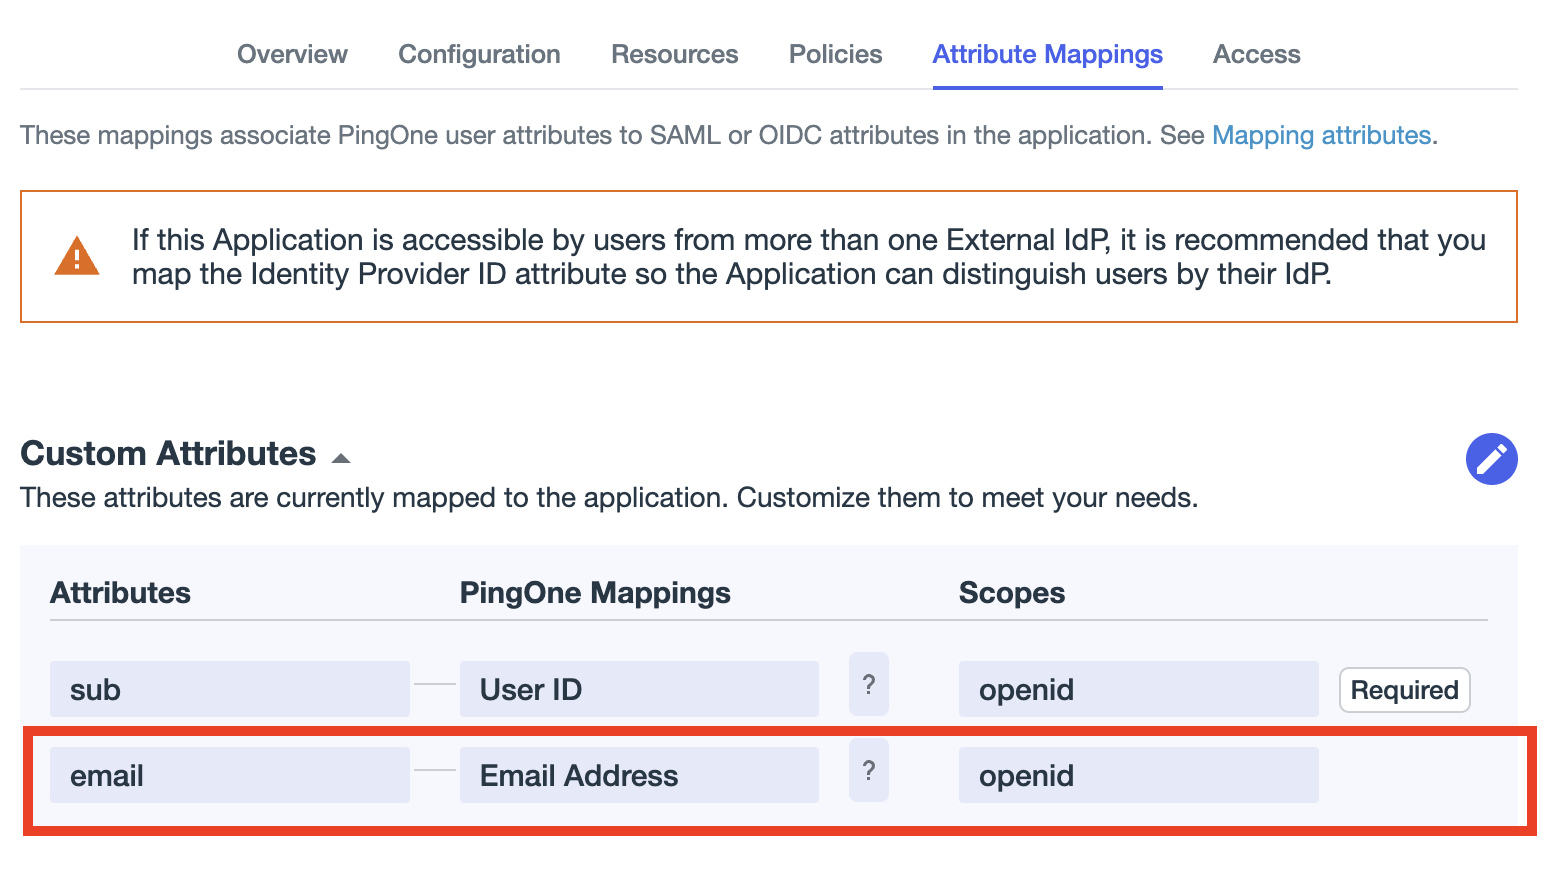
- Click Save.
Configure Faction
- Log into Faction as an admin user.
- Navigate to Admin -> Users.
- In the OAuth2.0 Configuration enter the Client Id you noted earlier from either Auth0, Google, or Ping.
- Enter the Client Secret you noted earlier.
- Enter the Discovery URL as follows:
- Google: https://accounts.google.com/.well-known/openid-configuration
- Auth0: Enter the Open Id Configuration URL you noted in step 11 above.
- Ping: Enter the OIDC Discovery Endpoint from step 13 above.
- Click Save

Adding an OAuth User
- Under Admin -> Users, Click Add User.
- The Username should be part of the user’s email address before the @ symbol. If the email is [email protected] then the username is test.user
- ⭐️Leave the Password Field Blank.⭐️
- Enter the First and Last name.
- Enter the email address that is used by the OAuth solution to authenticate the user.
- Select OAuth 2.0 as the Authentication Method.
- Click Save Changes.

When the new user reaches the Login Screen they can enter just their username without a password and click Login. Faction will redirect the user to the configured Authentication Provider and redirect back.