Rich Text Custom Variables
Note
This is an Enterprise Only Feature
In the open source version, rich text support is limited to two predefined sections: Executive Summary and Risk Assessment. The Enterprise edition introduces Rich Text Custom Variables, allowing you to define additional rich text sections within your reports. This gives you significantly more flexibility and control over report structure and presentation, beyond the default sections.
The following tutorial shows you how to add these to your reports.
Create the Custom Variable
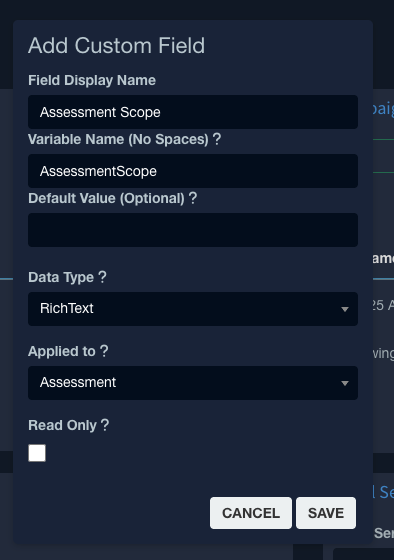
- Navigate to Admin->Settings
- Enter a title into the Field Name Display
- Enter a variable name WITHOUT SPACES
- Select RichText from the DataType
- Choose where this field is applicable (Assessment or Vulnerability)
In this Example we will create a custom Scoping Field that we can add anywhere in the report.
(Optional) Create Boiler Plate text
You can create a default text to be easily recalled into any of these custom variables. In this example we will continue with adding a template for Scope:
- Navigate to Templates->Assessment Templates

- Select the newly created Template and any custom text:
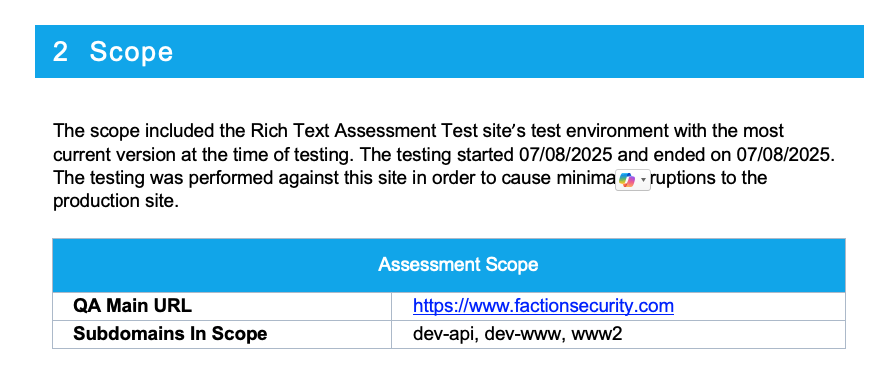
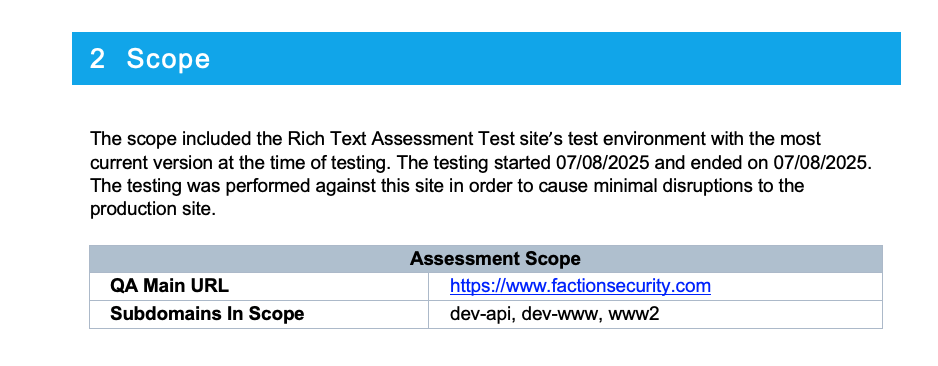
The scope included the ${asmtName}  site’s test environment with the most current version at the time of testing. The testing started ${asmtStart} and ended on ${asmtEnd}. The testing was performed against this site in order to cause minimal disruptions to the production site.

 | @cols=2:Assessment Scope |
 | ------------ | --------- |
 | **QA Main URL** |        |
 | **Subdomains In Scope**| |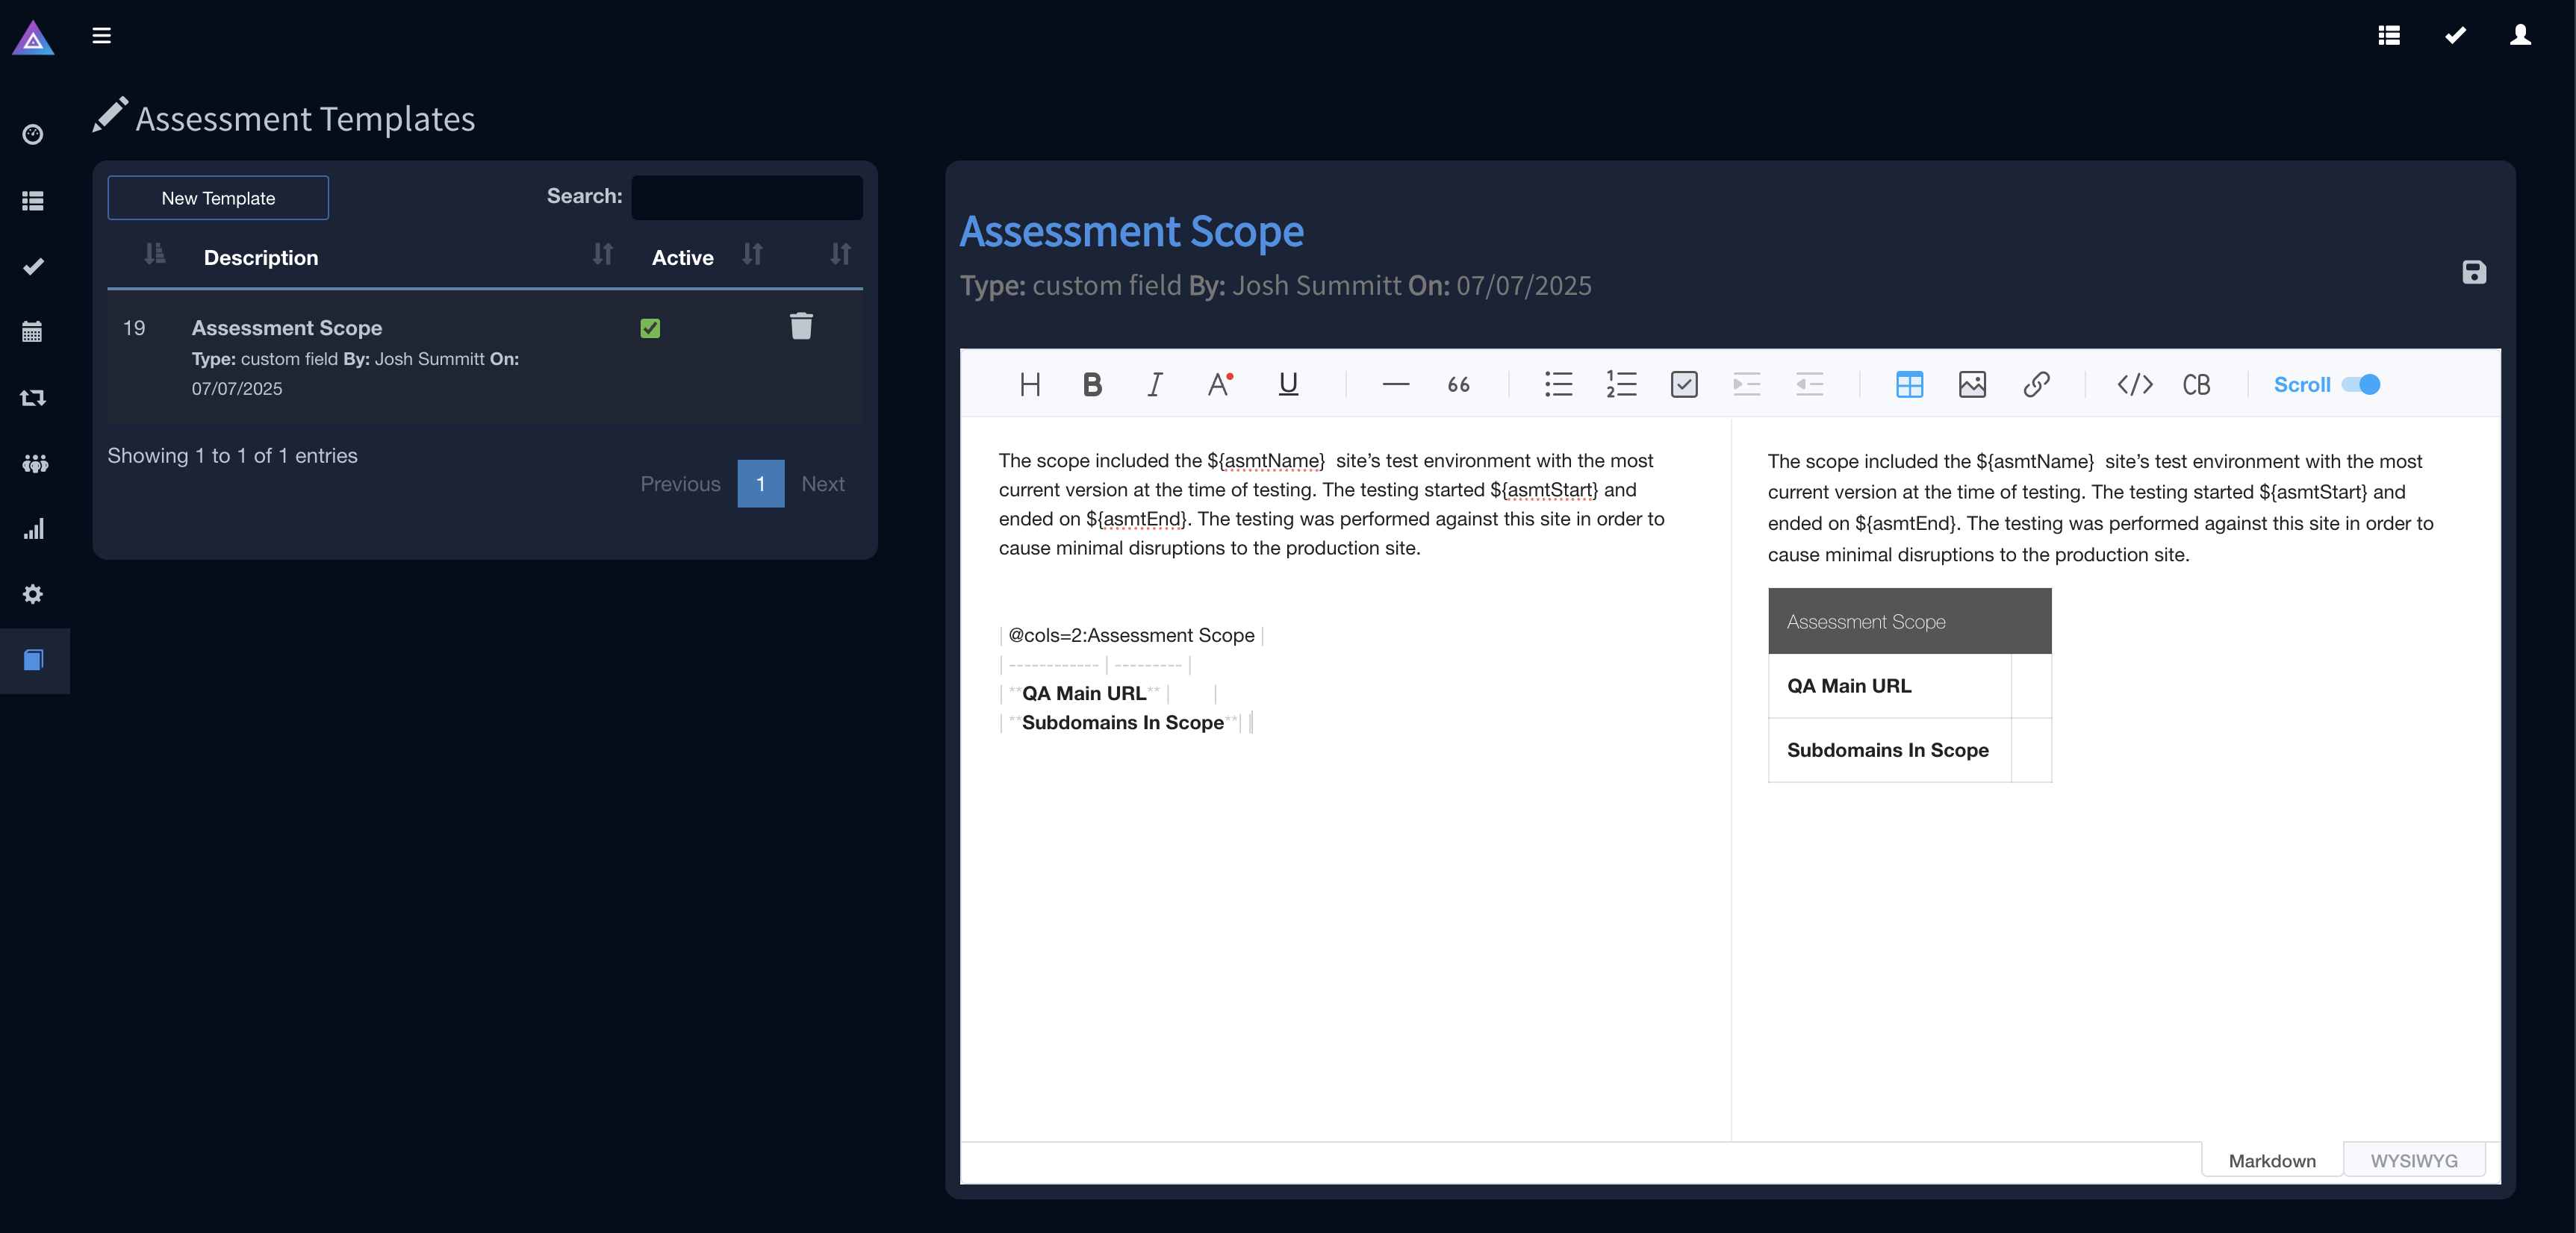
- Save the Template
Update the Report Template
- Take the your report template and add a new section. In this example we will add a Scope Section.
- Enter the variable name
${cfAssessmentScope}. This variable is text entered in Step3 above and prepended withcffor Custom Field.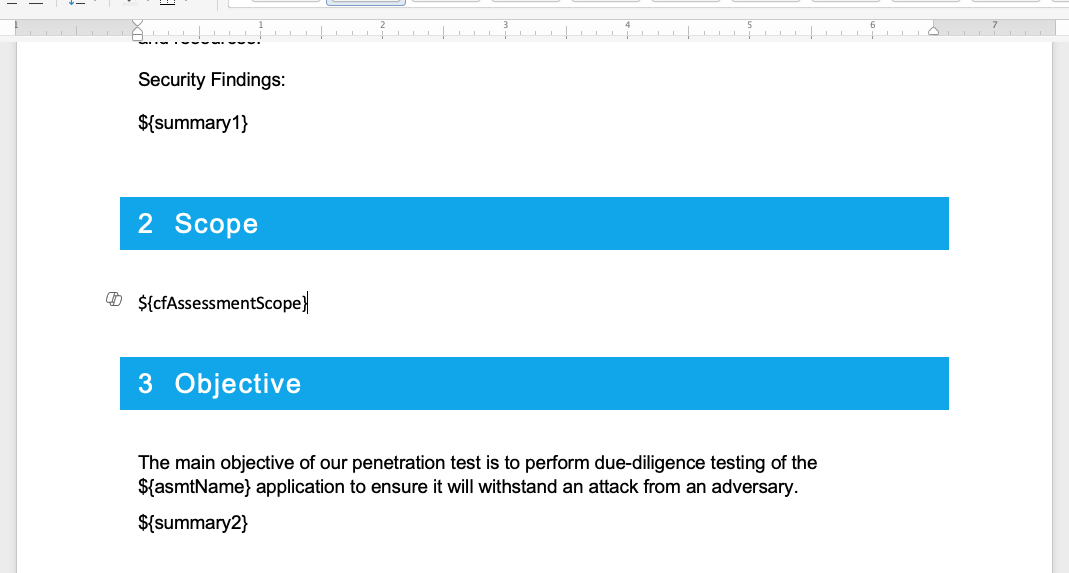
- Upload your report Template ( Templates->Report Designer )
Editing Rich Text Variables in Assessments and Vulnerabilities
Once the field is added it will show up on the next assessment thats created. Double click Assessment Scope in the templates options on the far right. This will add our boiler plate text (optional step above) to the report.

Note
If you have an existing assessment assigned to an assessor before the field is created then the new field will not be visible until you resave the assessment. If the user has permissions then they will see a Edit button in the title of the assessment. This will open the assessment in Scheduling and allow you to resave it. Otherwise you will need someone with Scheduling permissions find it and resave it. *You don't need to make any changes to the assessment. Just save it. *
Now you can generate the report (Assessment->Finalize->Generate Report). This will build the report with our new custom variables populated.
Advanced Formatting
You can further enhance the appearance of your report by editing the CSS in the Report Designer. This allows you to apply custom styles specifically to this custom variable without affecting the global report template.
Note
The name of the custom variable is used as a CSS class. All content entered in the Rich Text Editor is automatically wrapped in a <div> with that class name, for example: <div class="VariableName">Rich Text Content Here</div>.
Continuing with our example of adding a Scope section, follow these steps to add custom style to the Scope Table so that the header matches our theme:
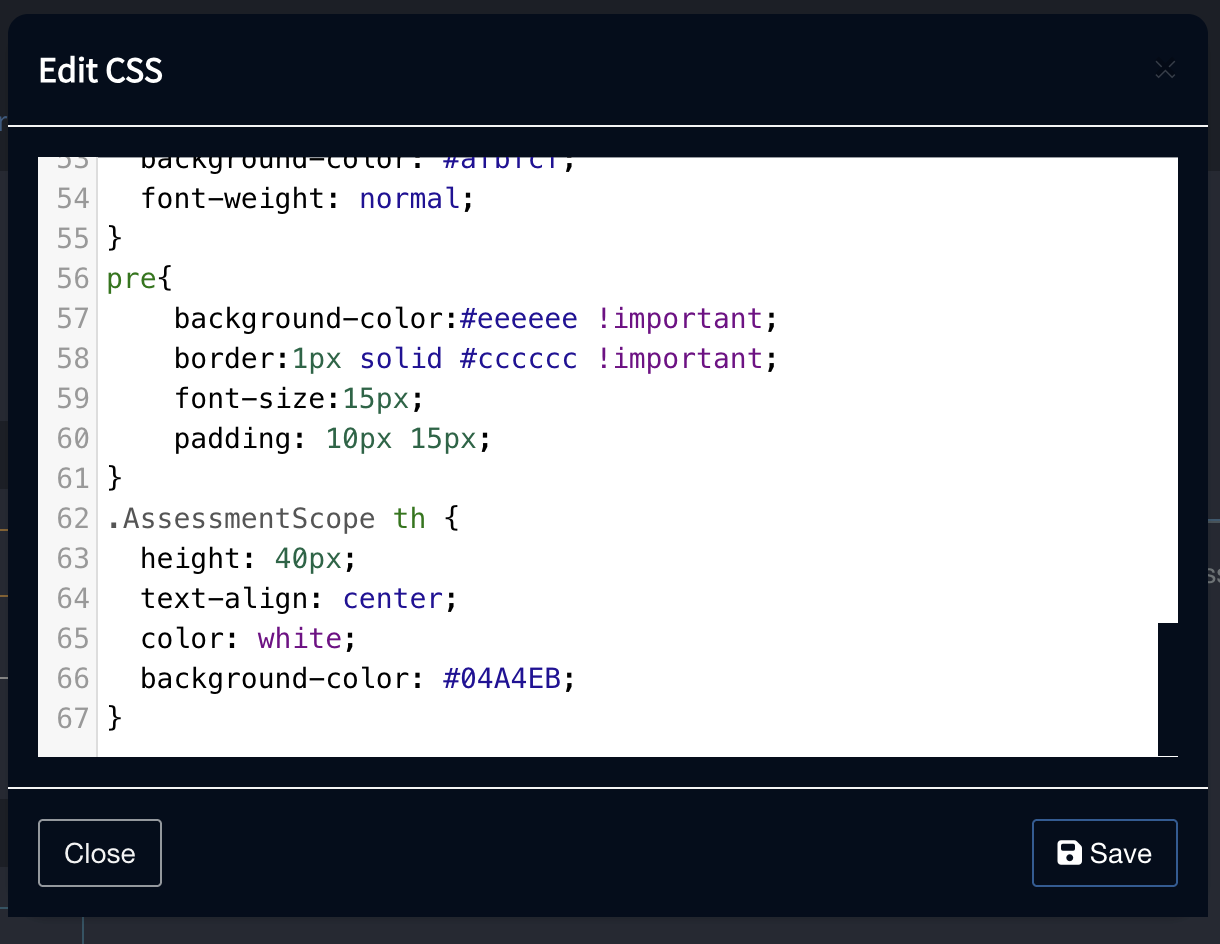
- Navigate to Templates->Report Designer
- Click Edit CSS
-
Append the following CSS to the form. Note AssessmentScope as the class name
 4. Save it
5. Regenerate your report
4. Save it
5. Regenerate your report