SAML MS Entra ID Configuration
Overview
This tutorial will walk you through the steps required to set up Faction with your Microsoft Entra ID Single Sign On using SAML
Configuring Entra ID in Azure
- Open the Azure Console and navigate to "Entra Id"
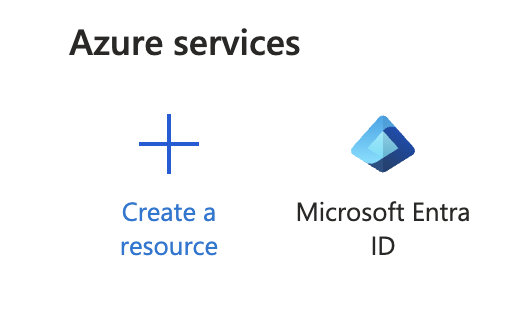
- Navigate to Enterprise Applications:
- Click "New Application"
- Click "Create your own application."
- Enter a name (e.g., Faction SAML) and select "Integrate any other application you don't find in the gallery (Non-gallery)" radio button.
- Click Manage->"Single Sign On", then select SAML
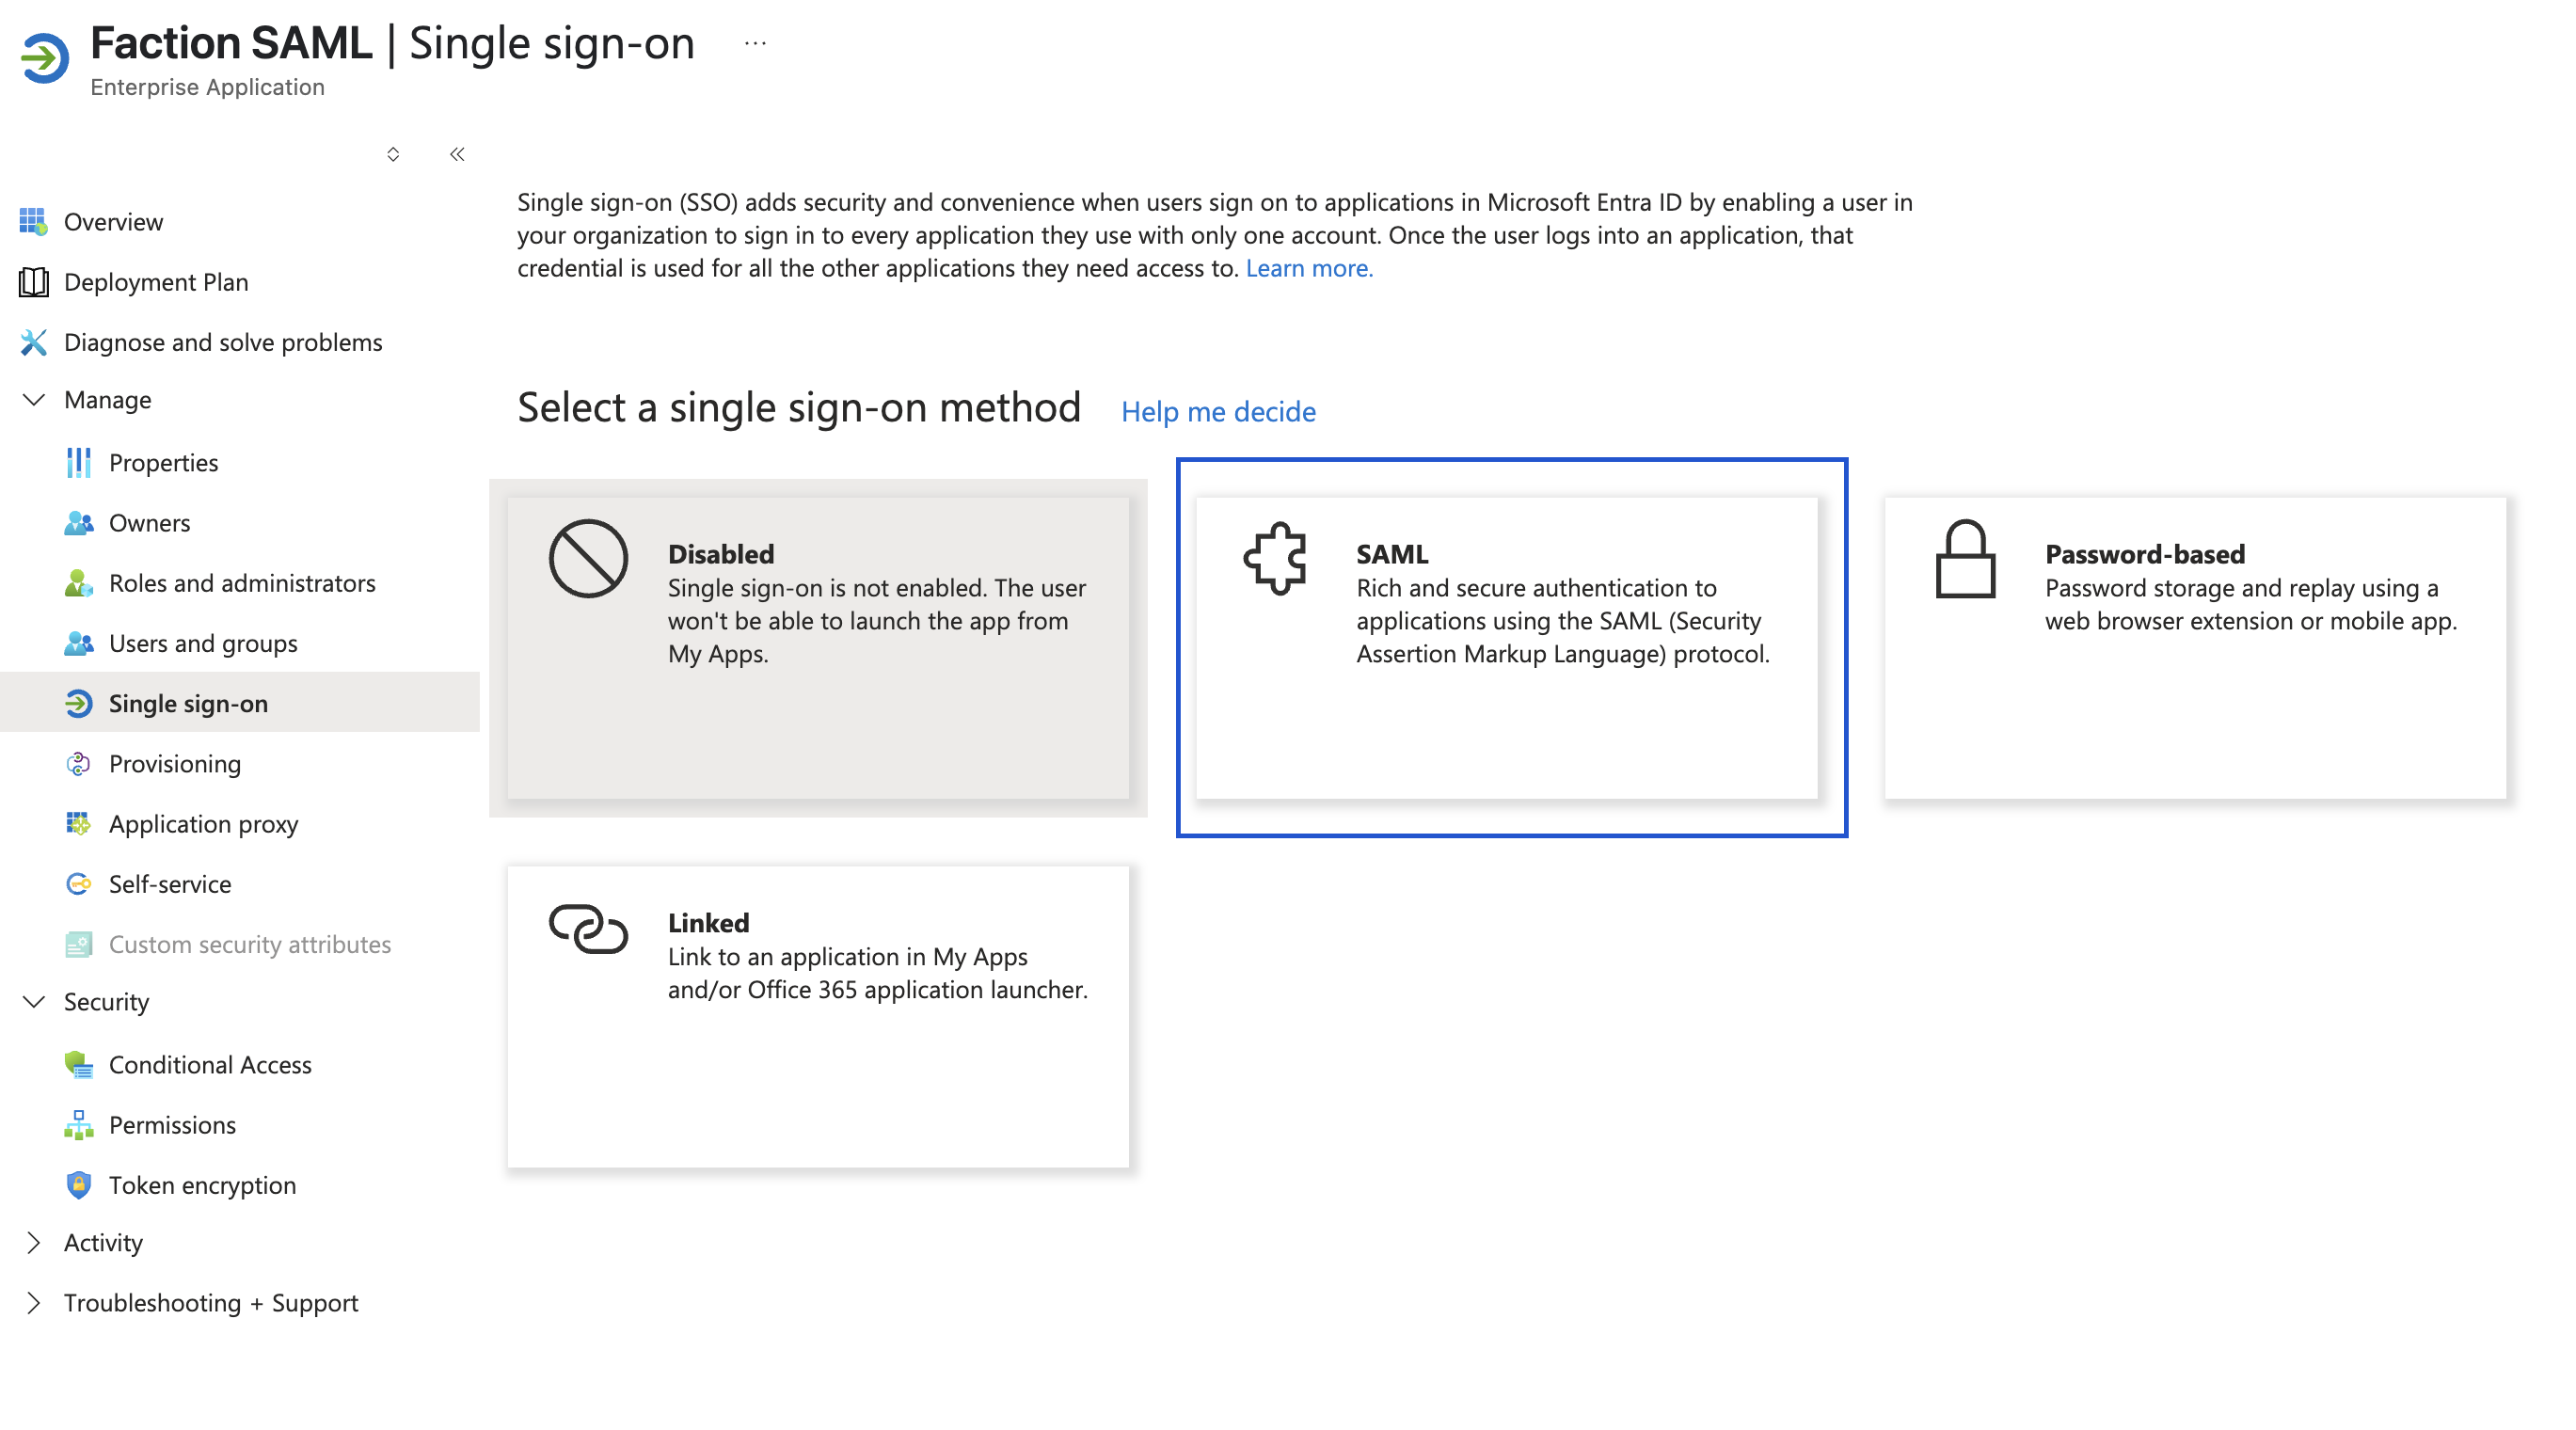
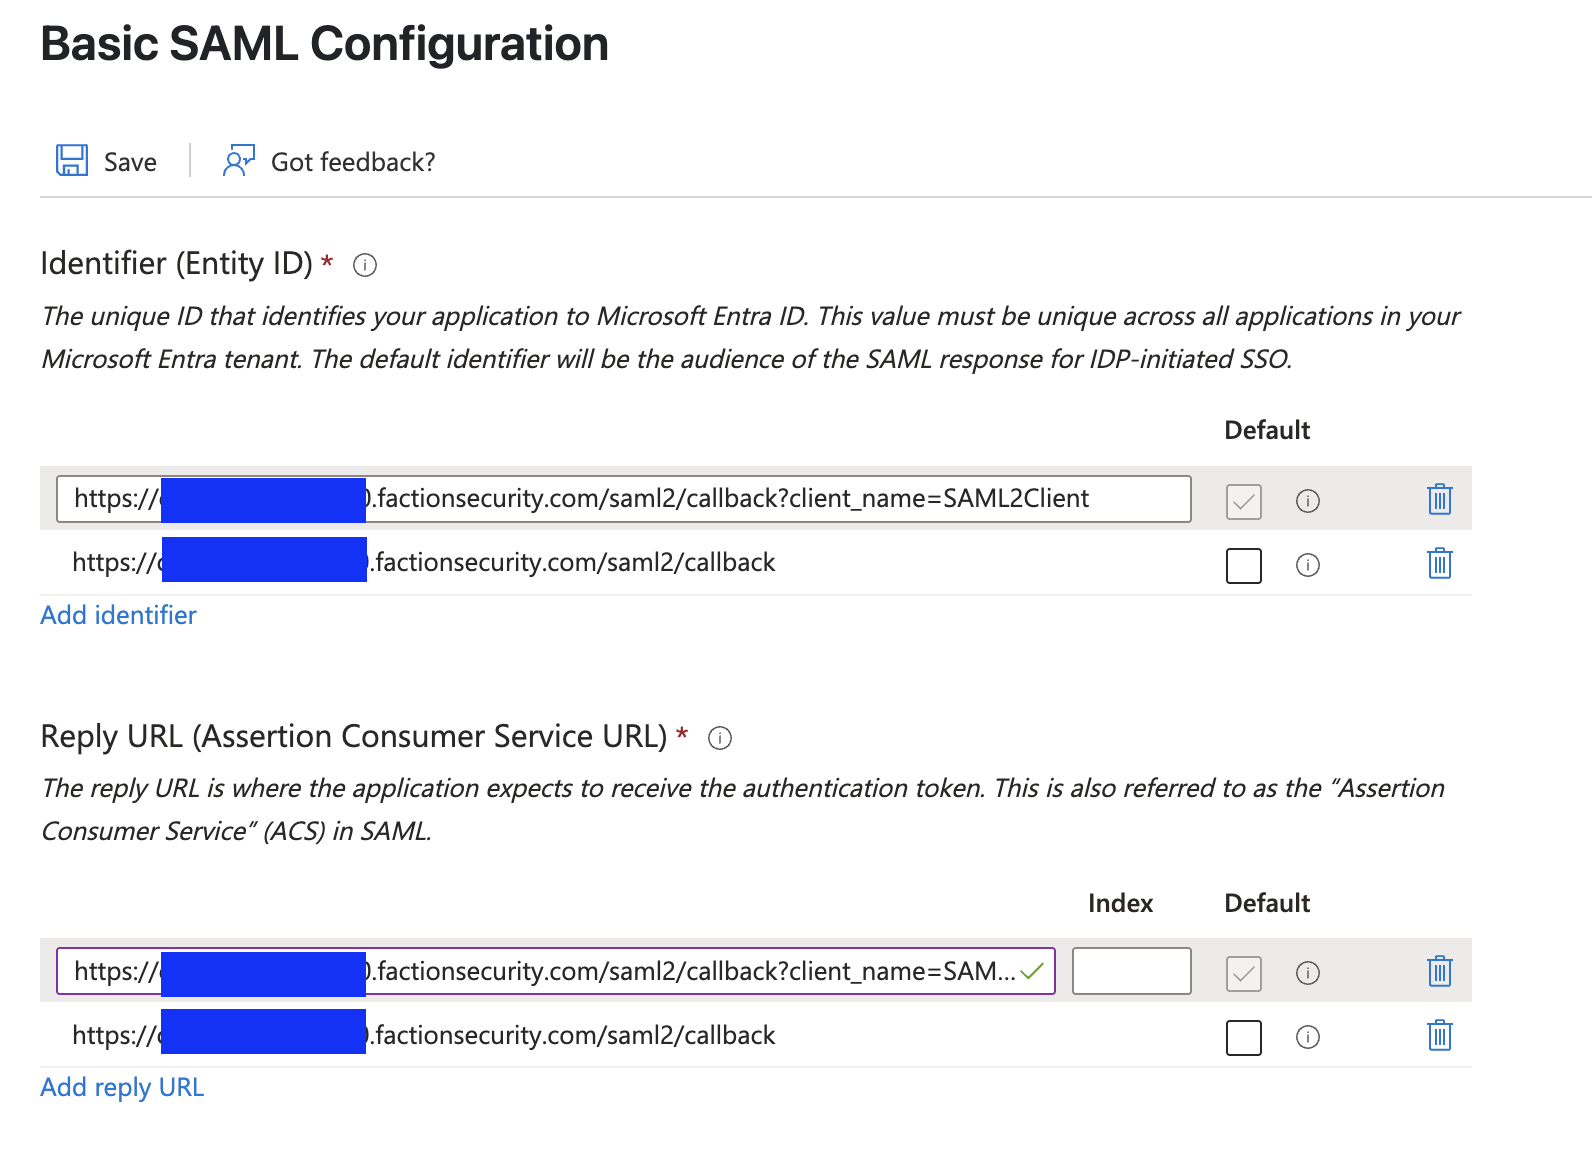
- Click 'Edit' under "Basic SAML Configuration"
- Under Identifier (Entity ID) enter the following URLs:
https://yourfactionurl.com/saml2/callback?client_name=SAMLClienthttps://yourfactionurl.com/saml2/callback- Under "Reply URL (Assertion Consumer Service URL)" add the following reply url:
https://yourfactionurl.com/saml2/callback?client_name=SAMLClienthttps://yourfactionurl.com/saml2/callback
- If your config looks like the image below, then click 'Save'
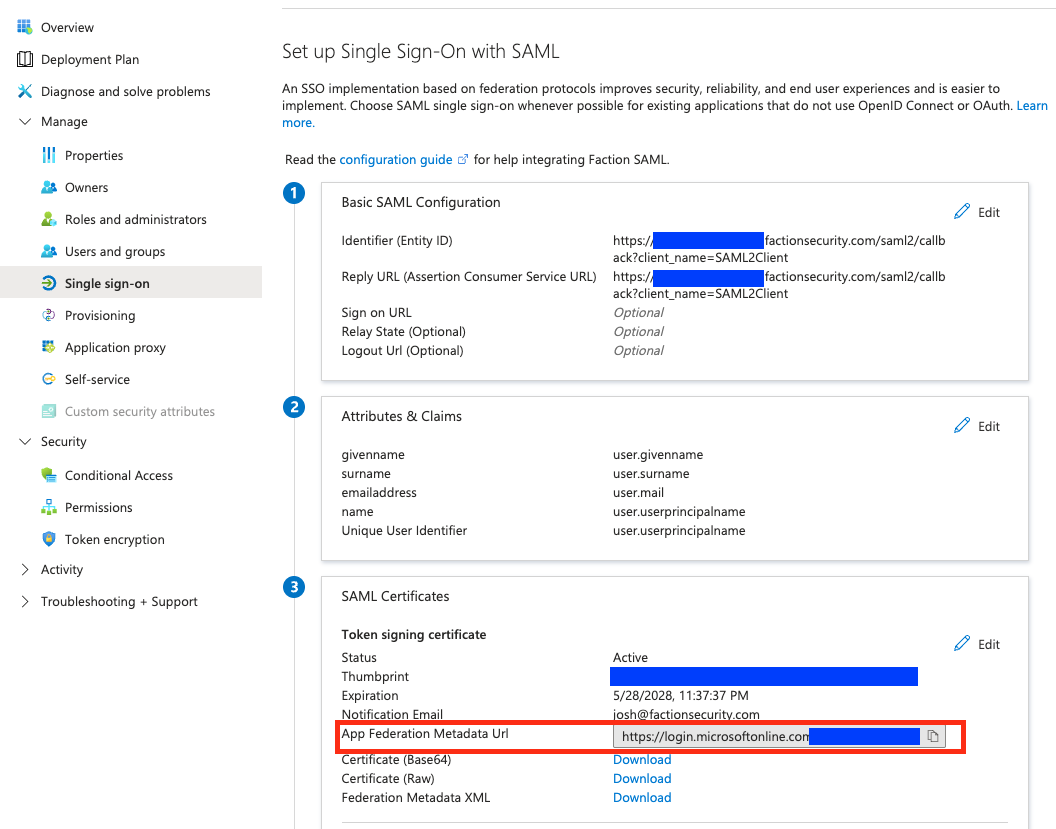
- Now navigate to "Single Sign On" and copy the "App Federation Metadata Url". This will be used in the next section.
Finish Configuration in FACTION
With the Federation URL copied, you are now ready to finish the configuration on the Faction side. 1. Log in to Faction as an admin 2. Navigate to Administration->Users 3. Scroll to the bottom and enter the URL we copied from step 11 above into "App Federation Metadata Url" input box. 4. Click Save
Configure a User for SAML Authentication
- Log in to Faction as admin
- Navigate to Administration->Users
- Click Add User
- Set the following parameters:
- Set username to the first part of the email address.
- Enter the first and last name of the user
- Leave the password blank
- Set the email address. It MUST match the email address of the user managed in Entra ID
- Set the "Authentication Method" to SAML2
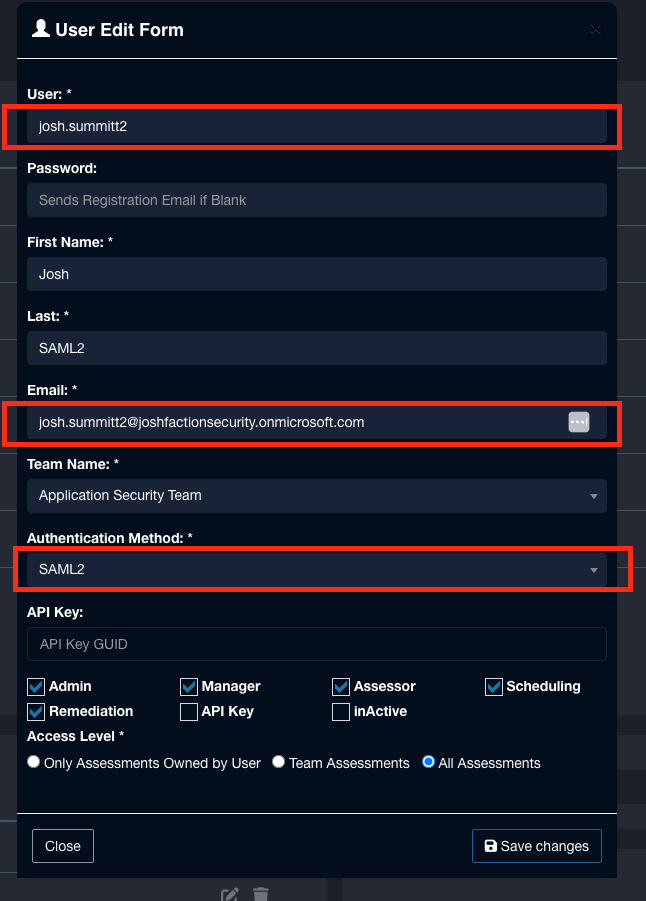
- Click Save
Login with SAML
SAML users only need to enter their username and submit login. Faction will automatically redirect the user to SSO login form.
IdP-Initiated SSO
In addition to the standard flow above (where login starts in Faction, known as SP-initiated), Faction supports IdP-initiated SSO. This is where login starts at the identity provider — for example, clicking the Faction tile in the Entra ID My Apps portal (https://myapps.microsoft.com) or an Okta dashboard. The IdP posts the SAML assertion directly to Faction's Assertion Consumer Service (ACS) and the user is signed in without ever visiting the Faction login page.
No extra Faction configuration is required — the same ACS endpoint used for SP-initiated login handles IdP-initiated responses:
Requirements for IdP-initiated login:
- The SAML application must be assigned to the user in the identity provider (in Entra ID: Enterprise Applications → your app → Users and groups).
- The assertion must include the user's email claim, and a Faction user must already exist with a matching email address (the same matching used for SP-initiated login — there is no automatic user creation).
- The assertion must be signed (Faction requires signed assertions).
Seamless Login and Re-authentication
By default Faction sets the SAML ForceAuthn flag, which asks the identity provider to prompt the user to re-authenticate on every login. For IdP-initiated SSO you usually want the opposite — to reuse the user's existing IdP session so they are signed in seamlessly. Two settings in the SAML2 Configuration section (under Admin → Users) control this:
- Force Re-authentication — leave this unchecked to reuse an existing IdP session (seamless SSO). Leave it checked to force the IdP to re-prompt on every login.
- Max Authentication Age (seconds) — the maximum age of the IdP authentication Faction will accept. When re-authentication is disabled, the IdP reuses an existing session, so the original sign-in time may be hours old. The default of
86400(24 hours) accepts these; increase it to match your identity provider's session lifetime if users see an "authentication issue instant is too old" error.
Custom Sign-On URLs
You can bypass the username and password form by bookmarking the below URL. This ensures you don't need to enter a Username just to be redirected to your SSO portal where the user needs to enter their Username again. The below URL will redirect directly to your configured SSO portal for SAML.