Assessment Checklists
Overview
When conducting frequent penetration tests, having assessment-specific checklists that all assessors follow and document is critical for ensuring consistency, thoroughness, and accountability. These checklists act as structured guides that standardize testing procedures, helping teams avoid oversights and maintain coverage across all critical areas of an environment. Without them, even experienced assessors may miss essential steps due to time constraints, complexity, or assumptions about low-risk areas. A well-maintained checklist also ensures that repeatable methodologies are applied across engagements, making results more reliable and easier to compare over time.
Additionally, documented checklists provide transparency for clients and stakeholders by showing exactly what was tested and how. This supports compliance requirements, helps justify findings, and allows for more meaningful remediation planning. In team environments, it also facilitates knowledge sharing, onboarding of new assessors, and quality assurance reviews. Ultimately, standardized checklists are a foundational practice for delivering high-quality, trustworthy, and defensible penetration testing services.
Faction includes built-in support for checklists in both the open source and enterprise versions. You can create and manage as many checklists as needed, such as OWASP Top 10, Mobile Assessment Checks, or Network Assessment Tests. Once added, these checklists can be enforced as part of your assessments and even integrated into peer reviews. This provides an excellent way to ensure that assessments remain consistent, thorough, and aligned with best practices.
Adding a checklist
In this example we will add an OWASP Top 10 checklist.
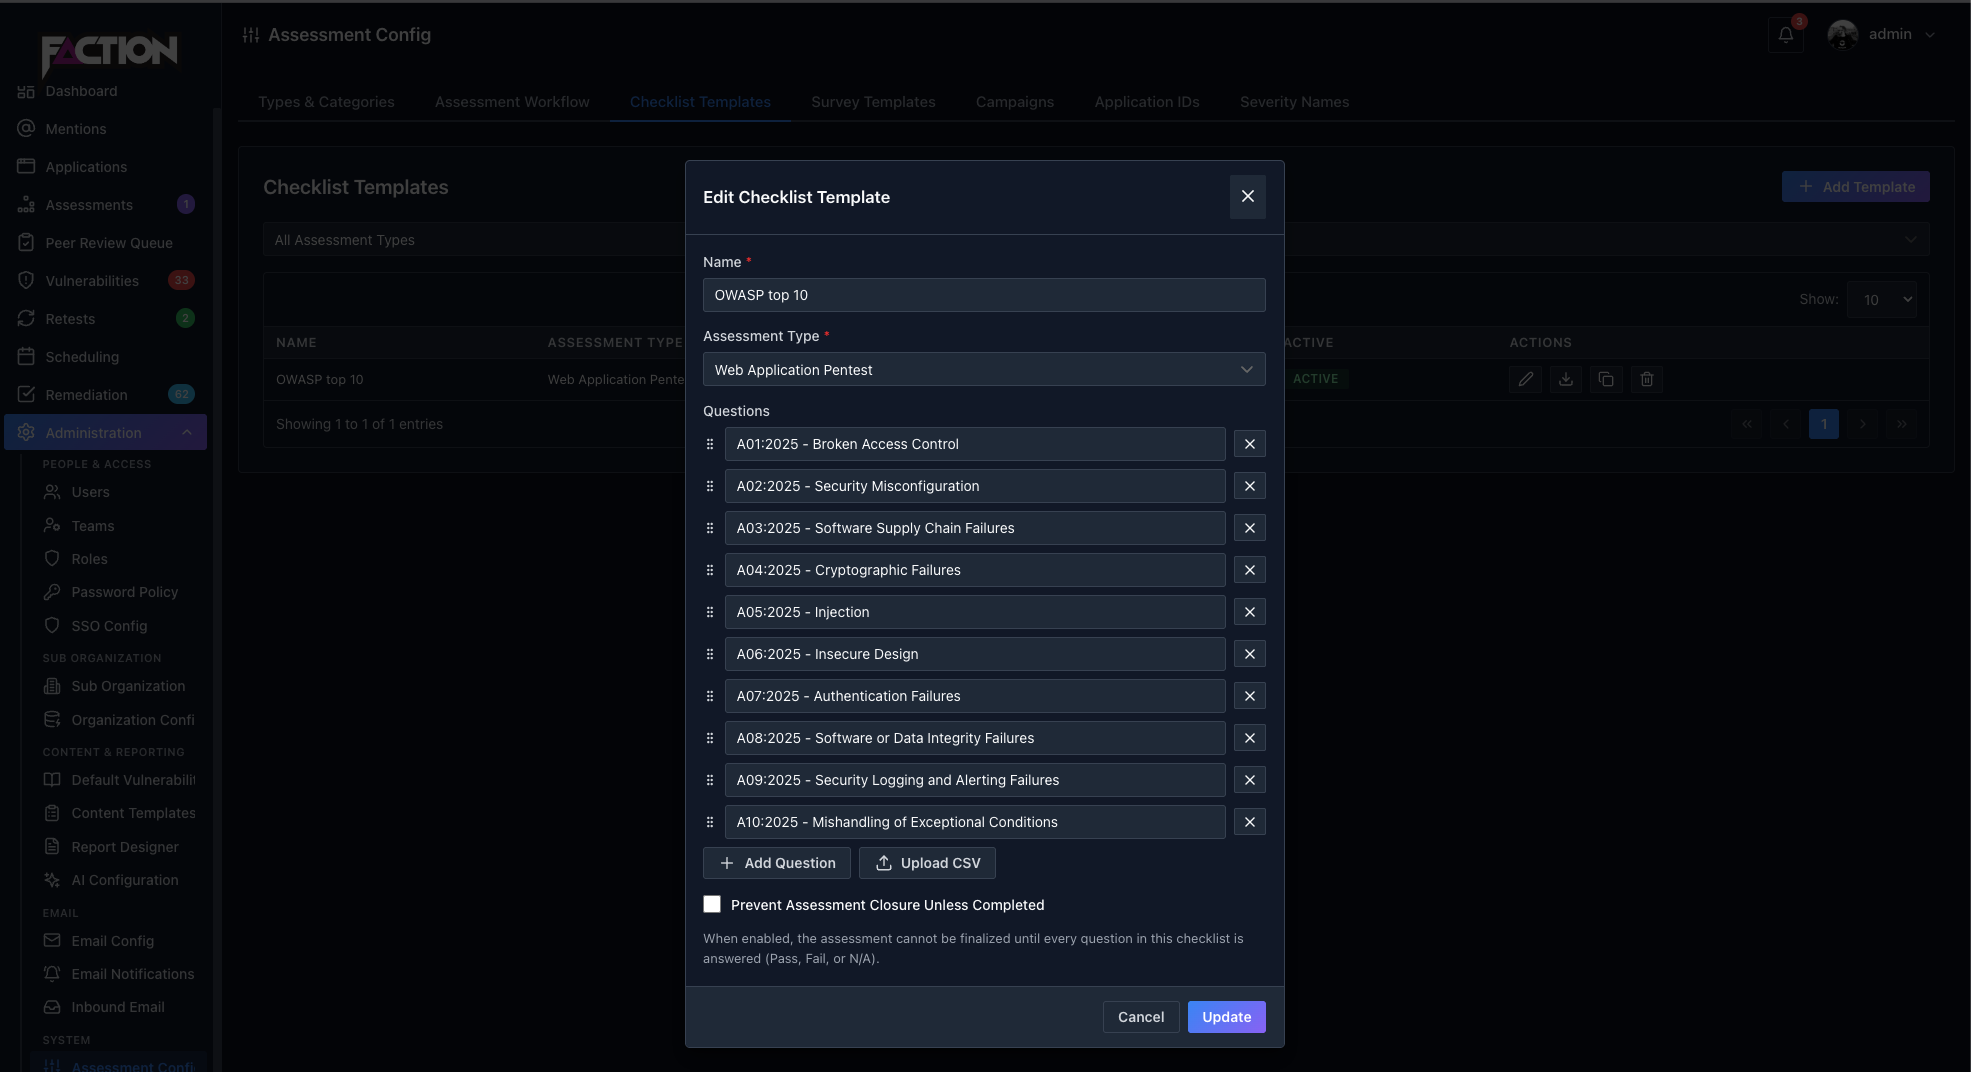
- Navigate to Admin → System → Assessment Config and scroll to Checklist Templates
- Click Add Template
- Give it a name, for example
OWASP Top 10 Checklist - Pick the Assessment Type the checklist belongs to. This is required and is what makes checklists assessment-specific: only checklists for the assessment's type are offered on the assessment
- Add the questions, one per line, in the order they should appear
- Tick Prevent Assessment Closure Unless Completed if the assessment must not be finalized until every question on this checklist has been answered
Filling out checklists in assessments
There is a Checklists tab in the assessment. The assessor adds the checklists that apply to this assessment with Add Checklist, then works through each question marking it Pass, Fail or N/A and leaving a comment where needed. A search box filters long checklists.
An assessment cannot be finalized while any checklist flagged "Prevent Assessment Closure" still has unanswered questions. The Finalize tab lists the checklists that are holding it up.
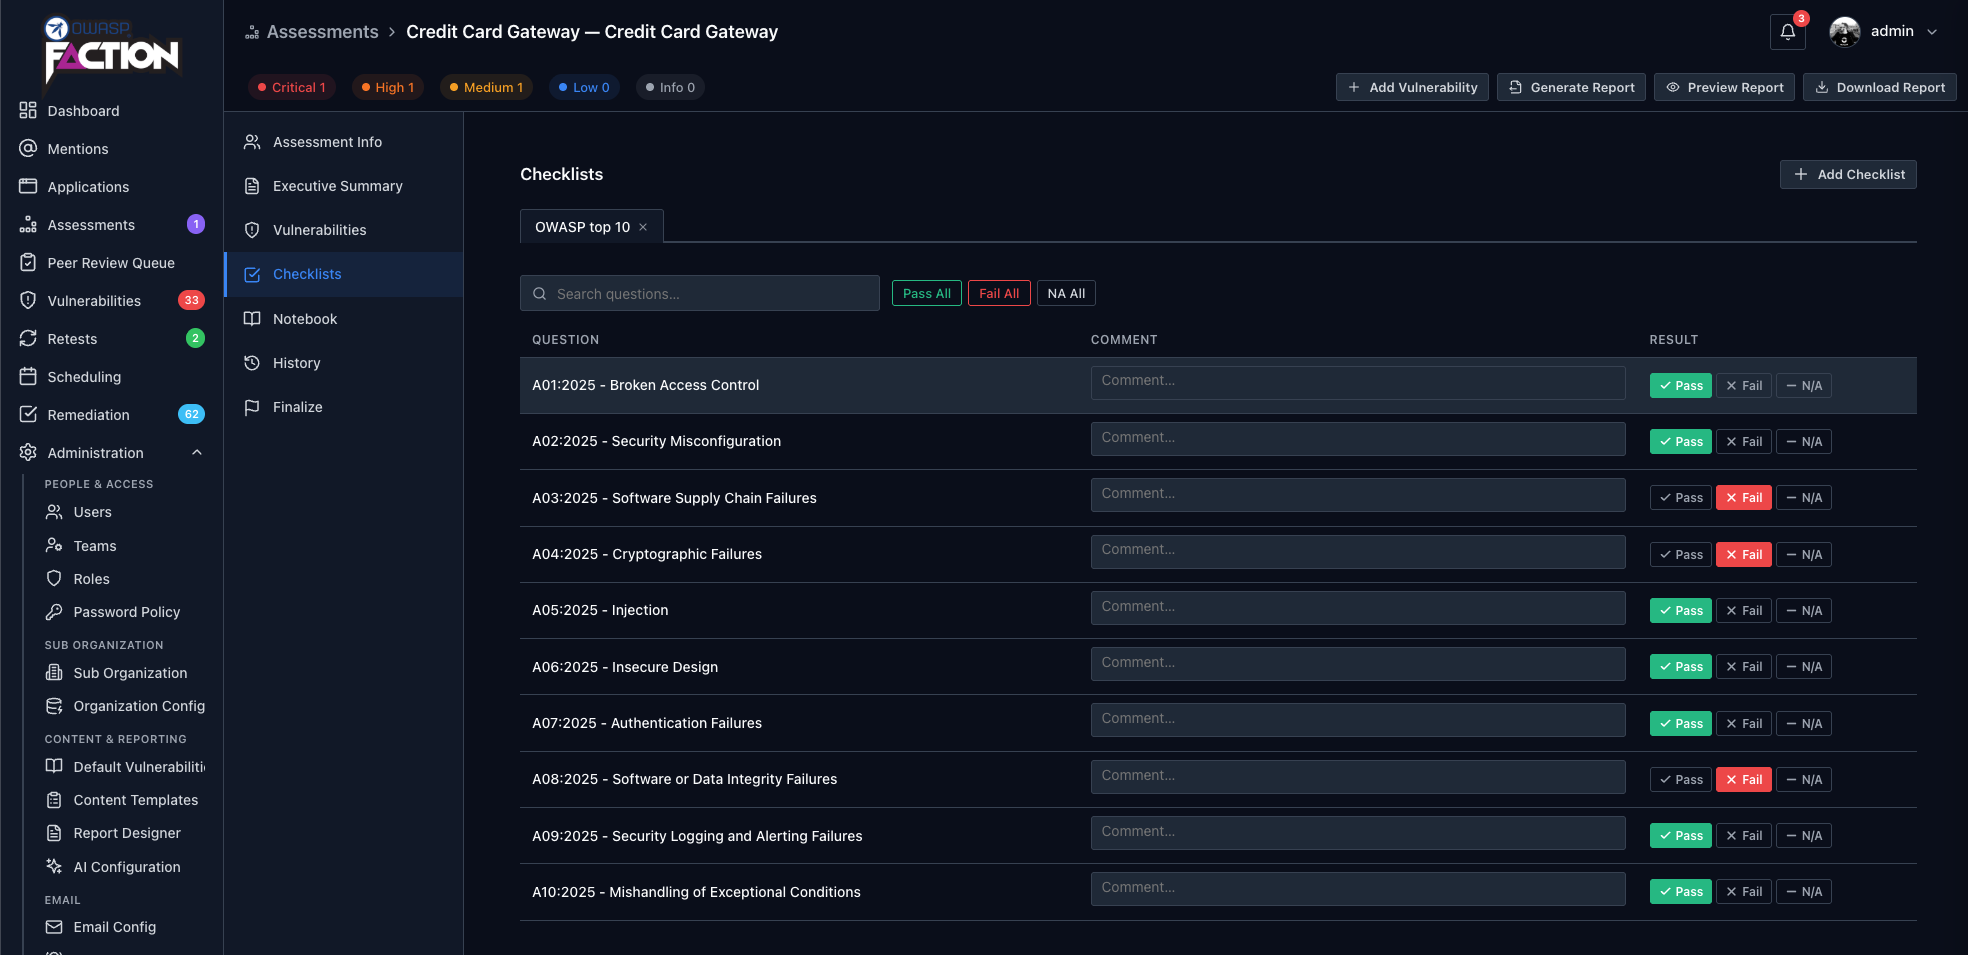
Once the assessment is finalized the checklists become read-only.
Adding checklists to reports (optional)
In addition to making it a sanity check for your assessments, you can choose to add certain checklists to your generated reports using the Checklist report extension from the App Store.
Enable the checklist extension
Faction 2 loads the same extension JARs as Faction 1, so the published extension works unmodified.
- Download the Checklist Extension here
- Navigate to Admin → System → App Store
- Click Install Extension in the upper right and choose
faction-report-checklist-X.X.jar - Back on the extension card, switch the extension On
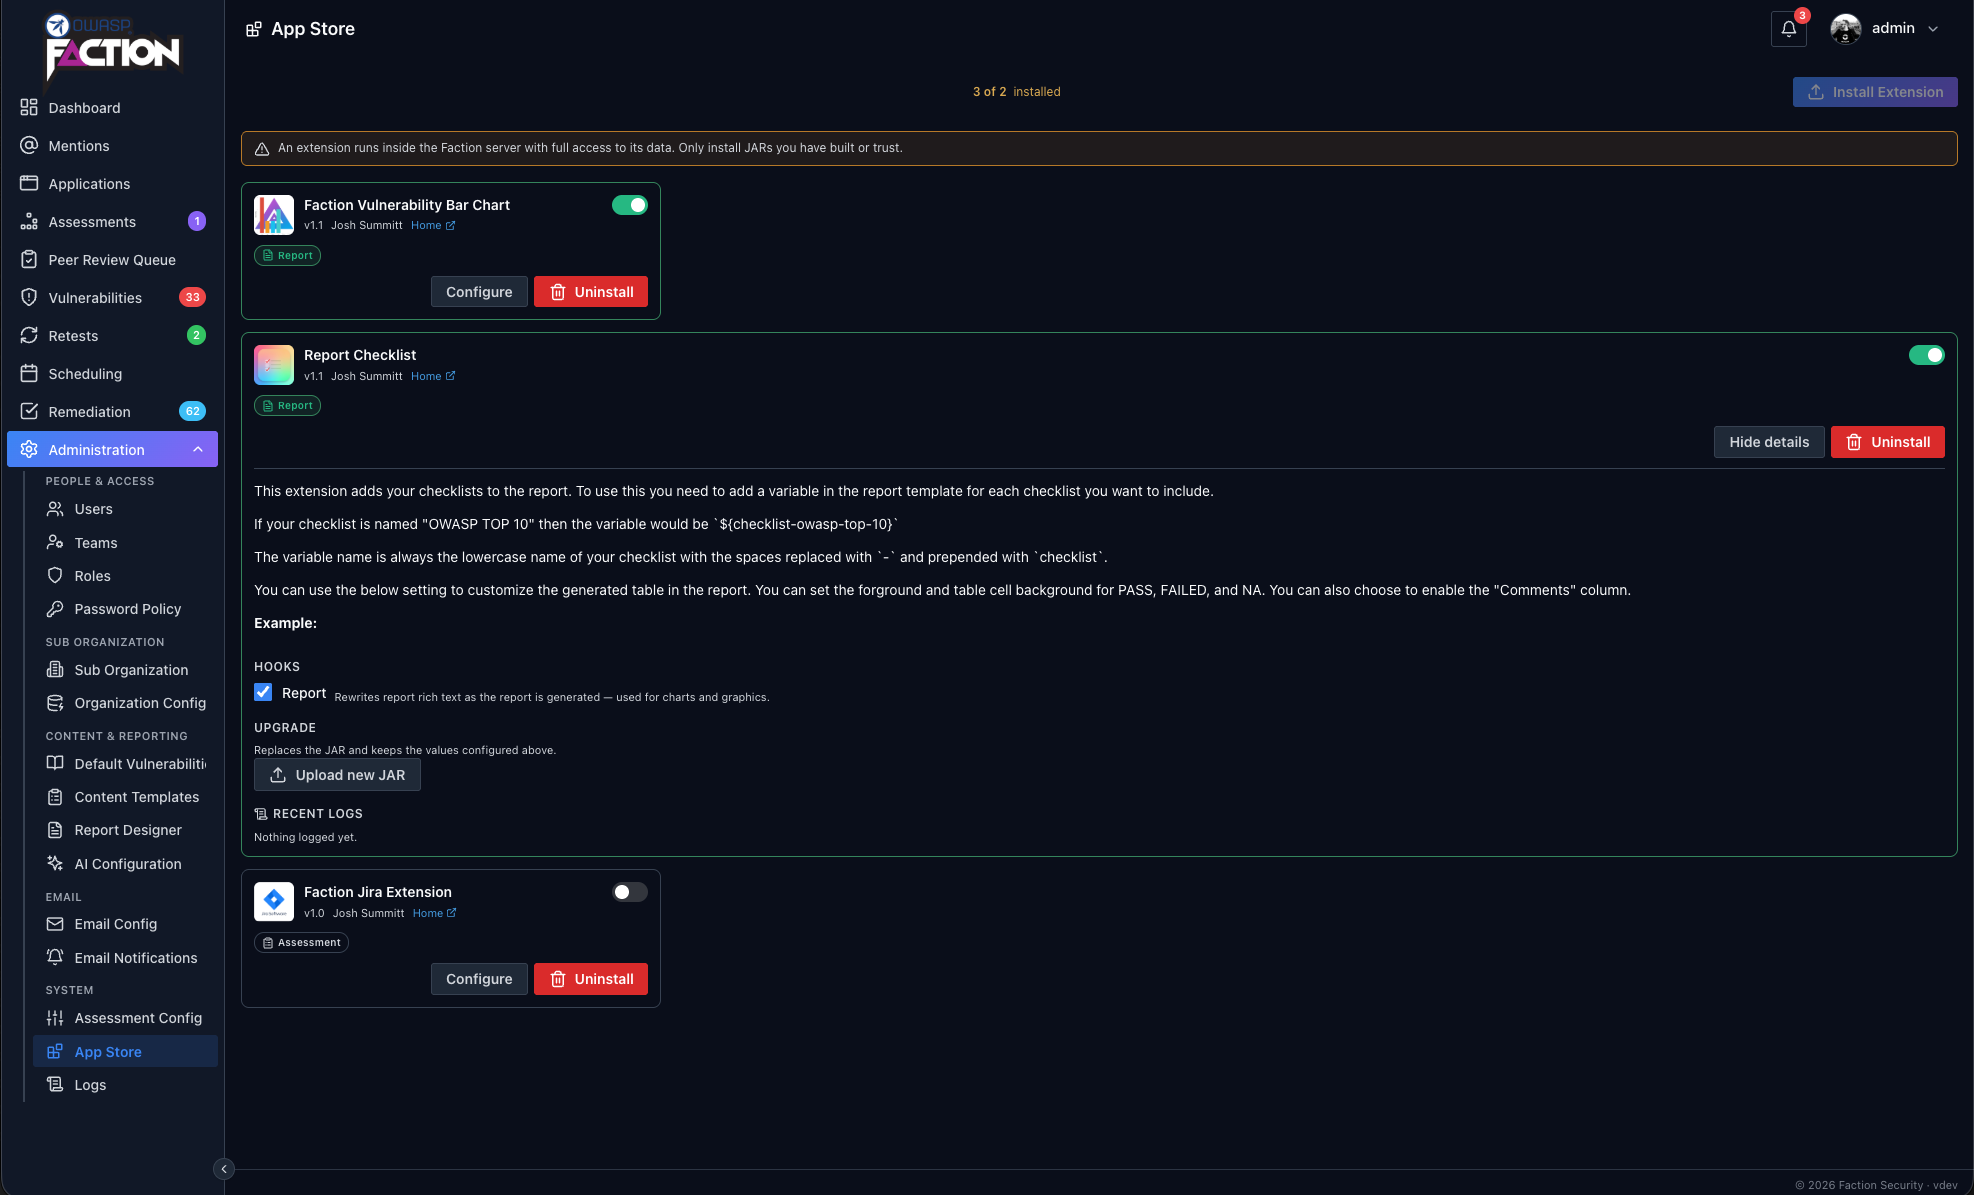
Warning
An extension runs inside the Faction server with full access to its data. Only install JARs you have built or trust.
Update the report template
Checklists can be added anywhere in your report using a variable named after the checklist. The variable name is the checklist title, lower-cased, with spaces replaced by hyphens. For instance, if you created a checklist named OWASP TOP 10, the variable will be ${checklist-owasp-top-10}.
The variable must be in a paragraph of its own. It can take arguments, for example to choose which columns are printed:
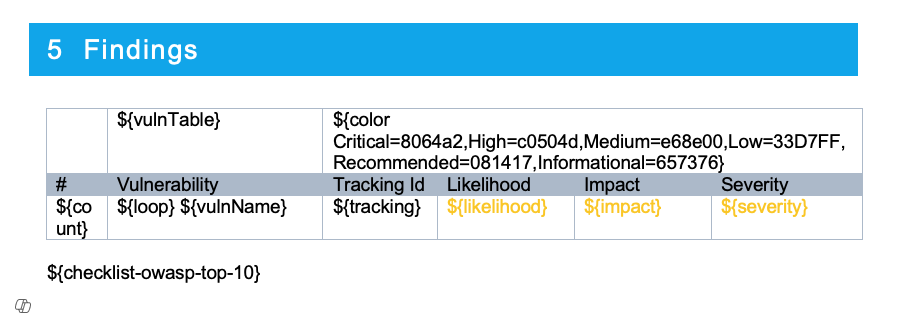
Once the report template is updated, generate the report from the assessment's Finalize tab (Report Documents → Generate Report). The default result will look like the following:
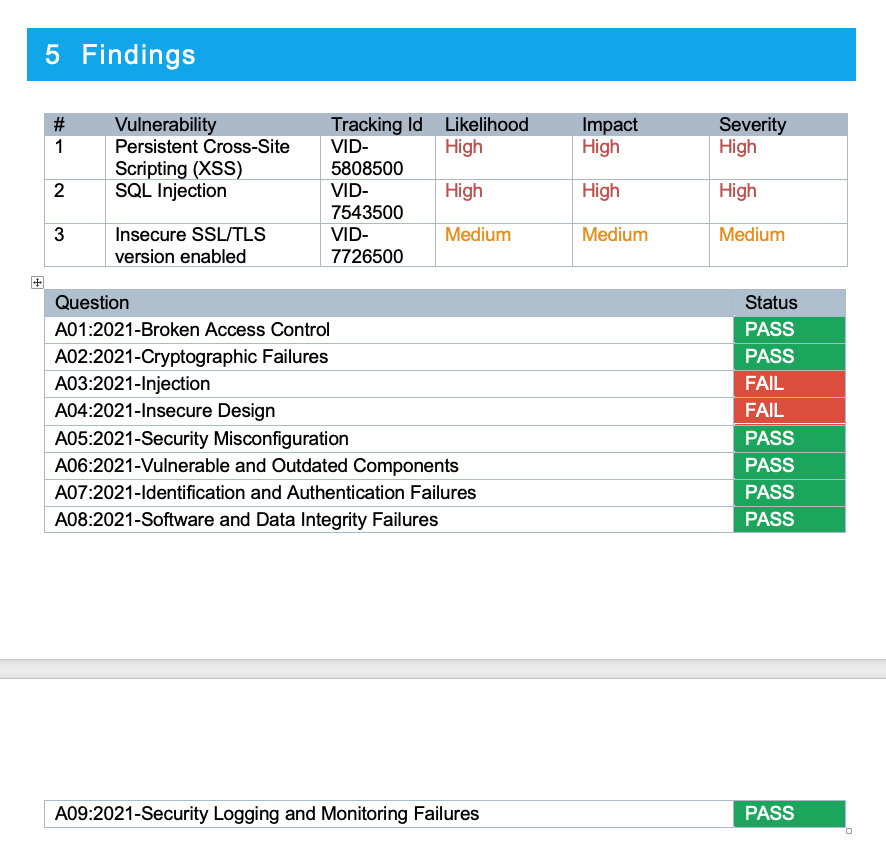
The generated table is wrapped in a div with the class checklist-owasp-top-10, so you can style each checklist from the template's CSS in the Report Designer.
Customizing the checklist extension output
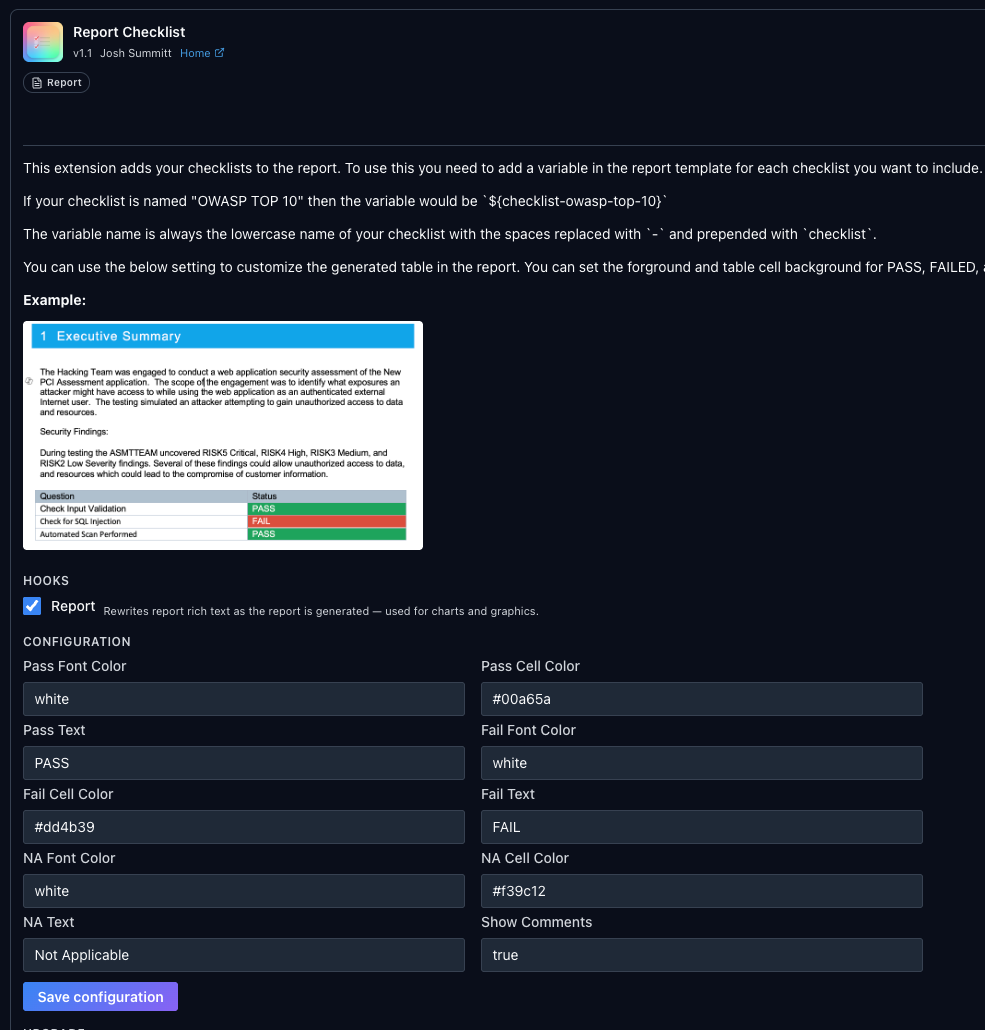
The checklist extension has several configurable options. You can change the text that is printed for the Pass, Fail and N/A statuses, and the background and foreground colors.
To configure the extension, navigate to Admin → System → App Store and click Configure on the Checklist Extension card. The options appear below the card; save them and regenerate the report to see the change.